A good window treatment can only be effective if it is installed properly. A key factor in this process is ensuring that the blind or shade fits the window properly.
Measuring blinds and shades doesn’t take much time or effort when you know what you are doing, however, mistakes can be costly.
Read as we give you a rundown on how to measure blinds and shades, plus some helpful tips too!
The Basics
Get your Things Ready
There are a few important things you will need to measure your blinds and shades properly. Note that without these, you will not be able to do the job effectively.
Here’s what you need:
- Paper or notepad
- Pen or pencil
- Steel measuring tape
Pretty simple, right?
Which is The Excellent Mounting Style: Inside Mount or Outside Mount?
Whether it’s blinds or shades, the very first thing you need to consider is what mounting style you are going to use. Regardless of what you choose, each one has its own pros and cons.
Regardless of what you choose, it will still have the same effect for privacy, comfort, and style.
Inside Mount Explained
Inside mount means that your blinds or shades are mounted in the trim or frame of your window. This option gives a classic and sophisticated look to any room. The tricky part in this kind of mount is that you need to ensure that the valence of your blinds fits neatly inside.
Pros
Inside Mount for your window treatments consume less space in the room. As such, they blend in well with the aesthetics. An inside mounted window covering is good for a small room.
Aside from this, opting for an inside mount will result in a sophisticated, clean, and minimalist look.
Cons
There are only a few disadvantages when using inside mounts, but they are minor. Since the blind (or shade) is fitted inside the frame, it can block your full view.
An inside mount fixing can also mean minimal light can still make its way through, even if it is properly measured – but that’s normally the result you would want!
How To Measure Inside Mount Coverings – Step-By-Step
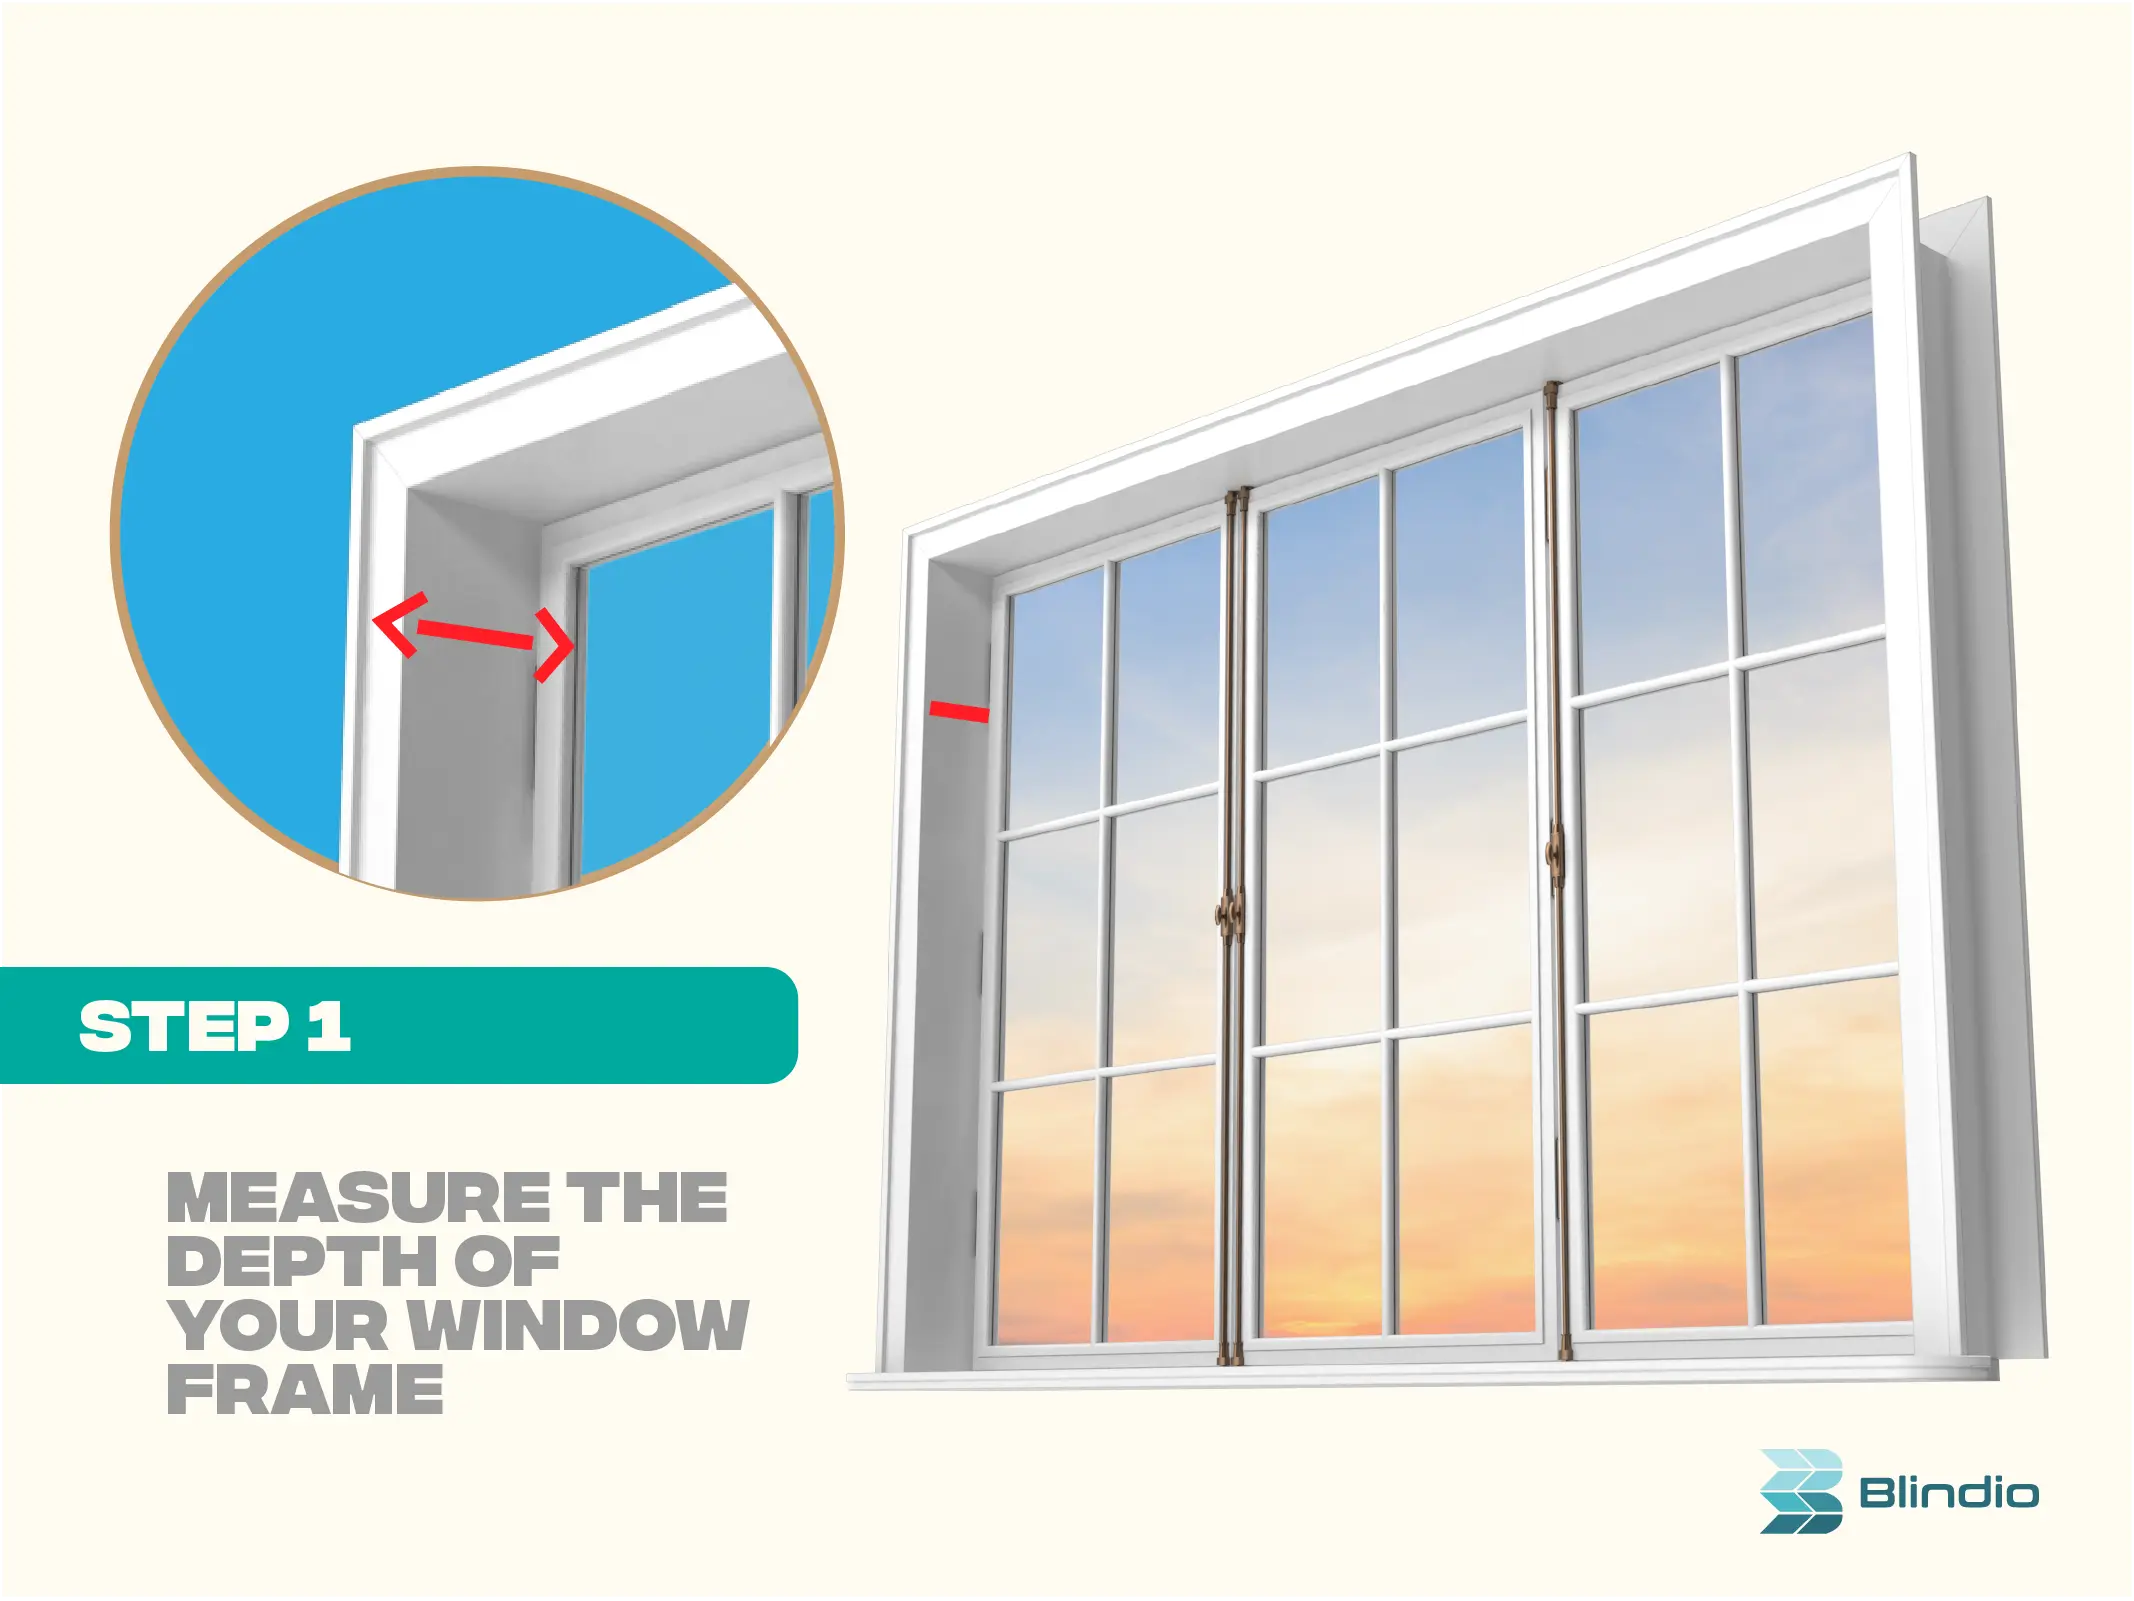
Step 1: Measure The Depth of Your Window Frame
With the window closed, use your steel measuring tape to take your measurement along one corner of the window. You need to measure from the window to the surface of the window trim. As this is an inside mount, do not include any part that extends beyond the trim.
The measurement that you will get is usually your hint of whether the window will be perfect for an inside mount. As such, ensure that you check the specifications for the minimum requirements for an inside mount fixing. For example, Venetian blinds have a depth requirement of around two inches.
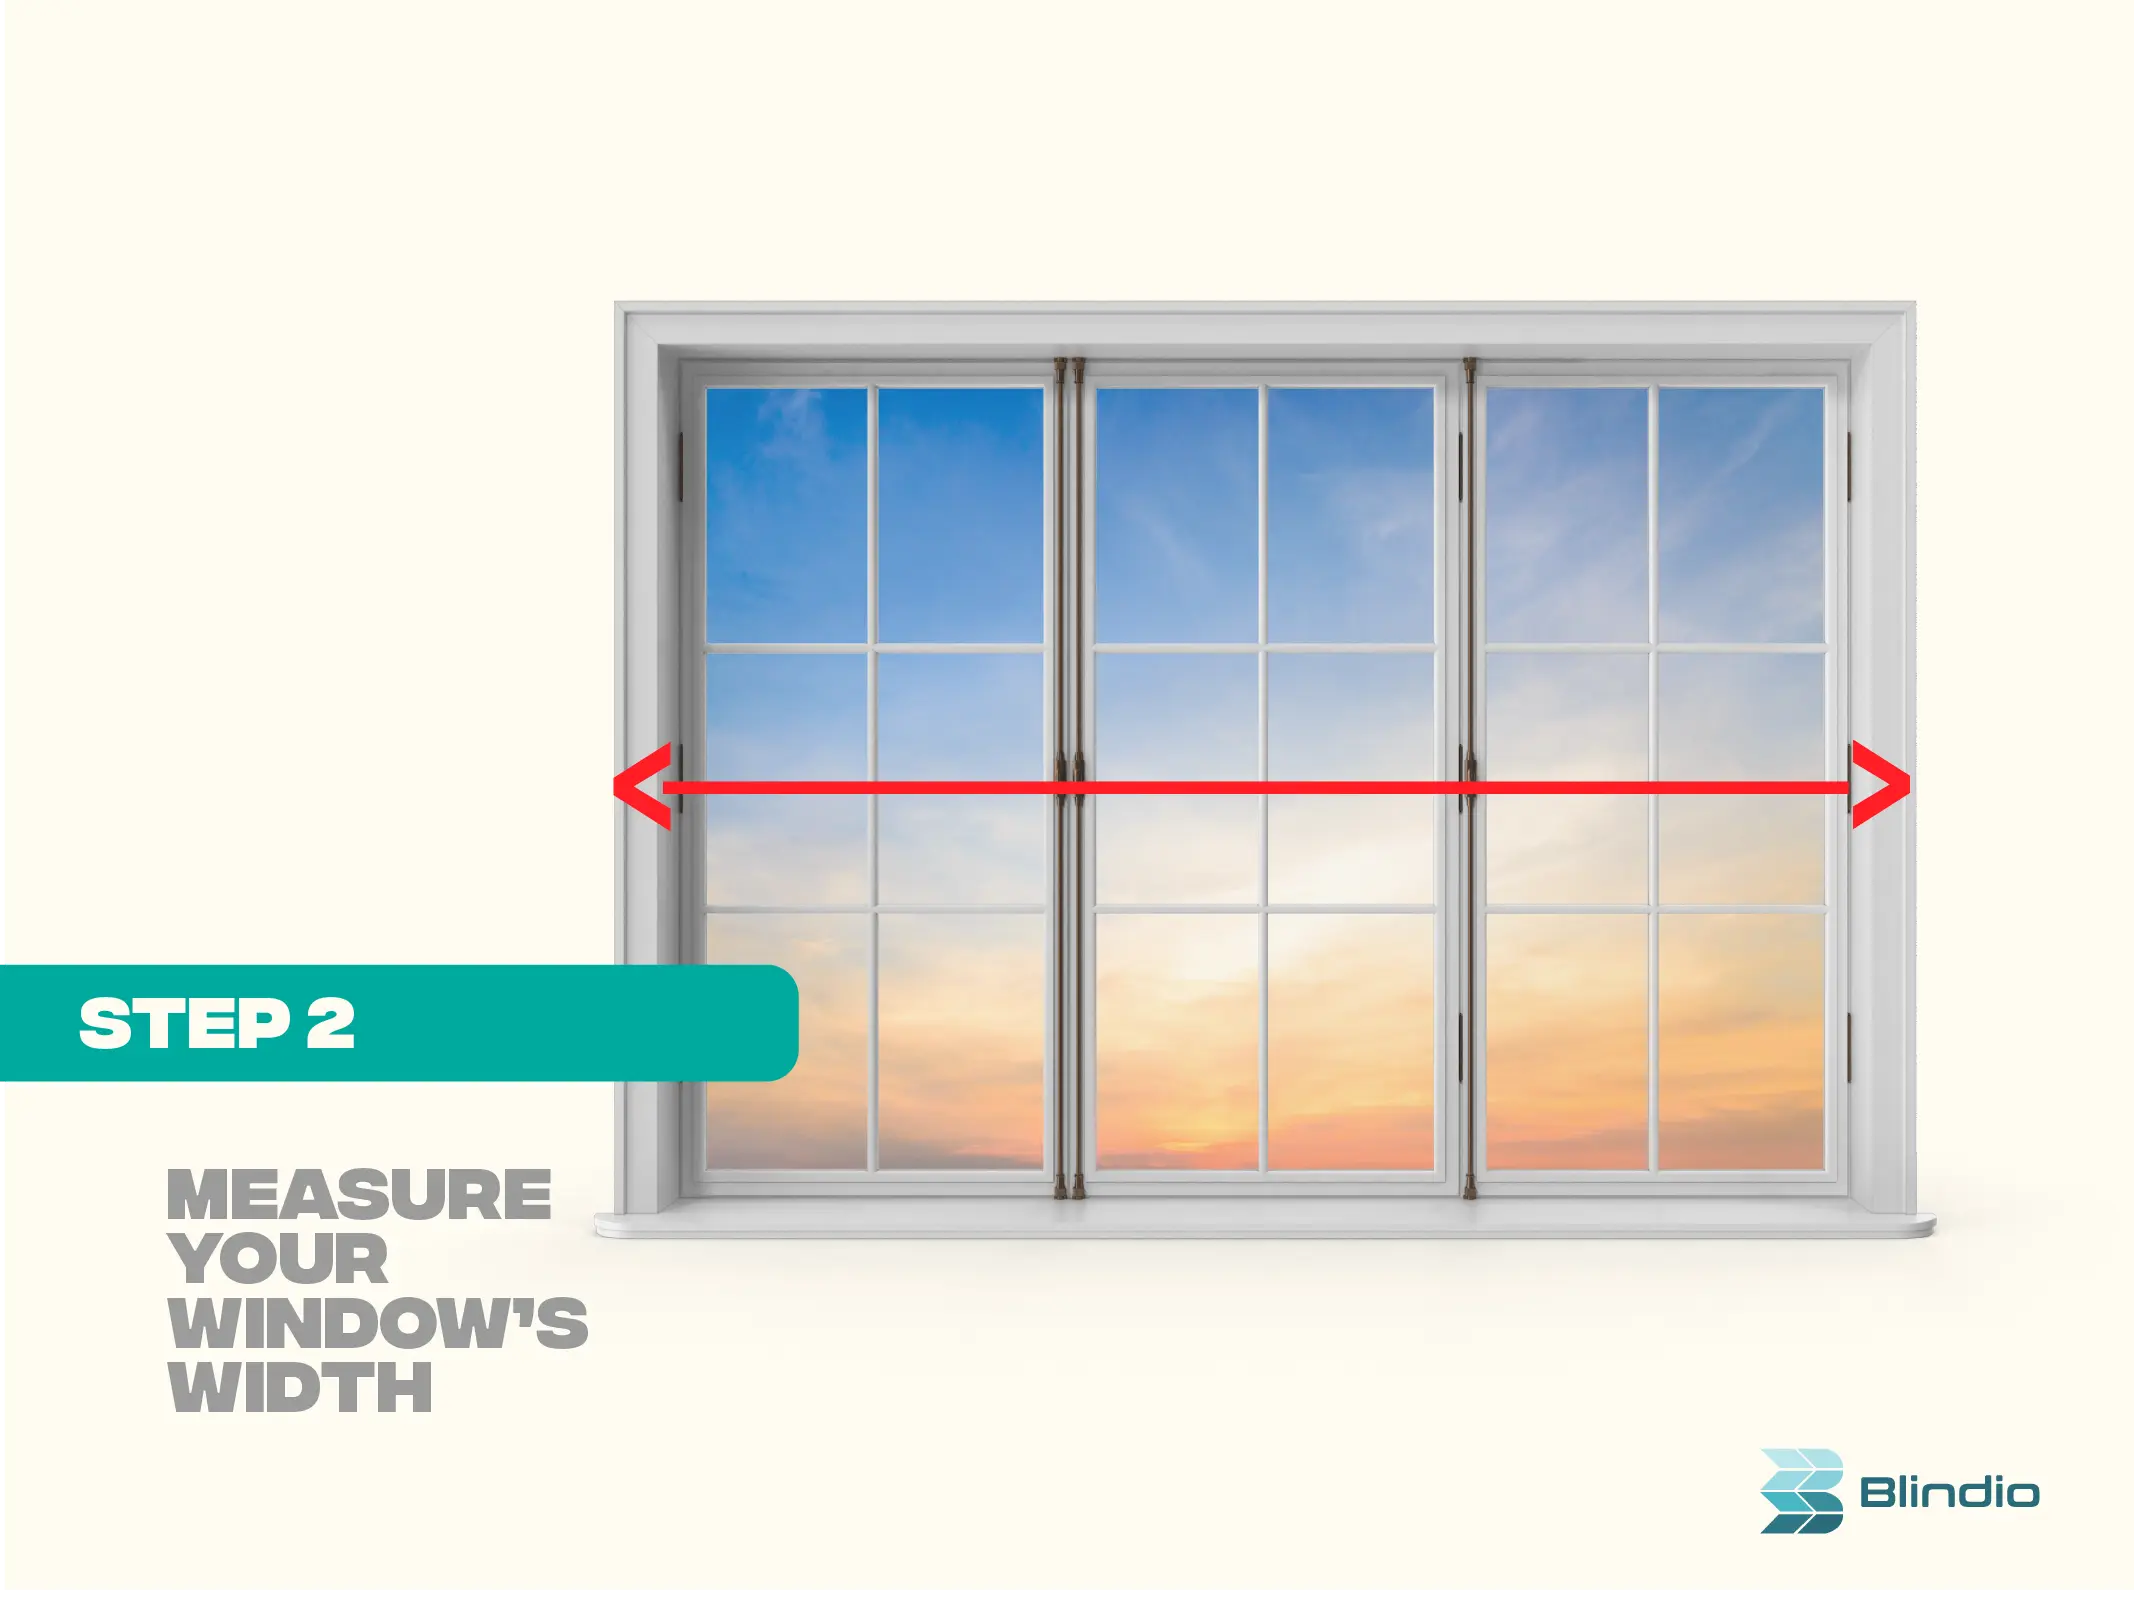
Step 2: Measure Your Window’s Width
Measure the width of your window. You need to start at one side and then place the end of your measuring tape against the inside of the window casing.
After which, pull the measuring tape across the window. Stop when you reach the inside of the window casing on the opposite side.
There are different techniques for measuring different kinds of blinds. You need to remember the following:
- If you are measuring for vertical blinds or solar shades, do this measurement once at the apex of your window.
- Complete this step three times if you are measuring for other types of blinds and shades. Once at the apex, in the middle, and at the bottom, respectively.
Write down the narrowest measurement to the nearest 1/8th inch.
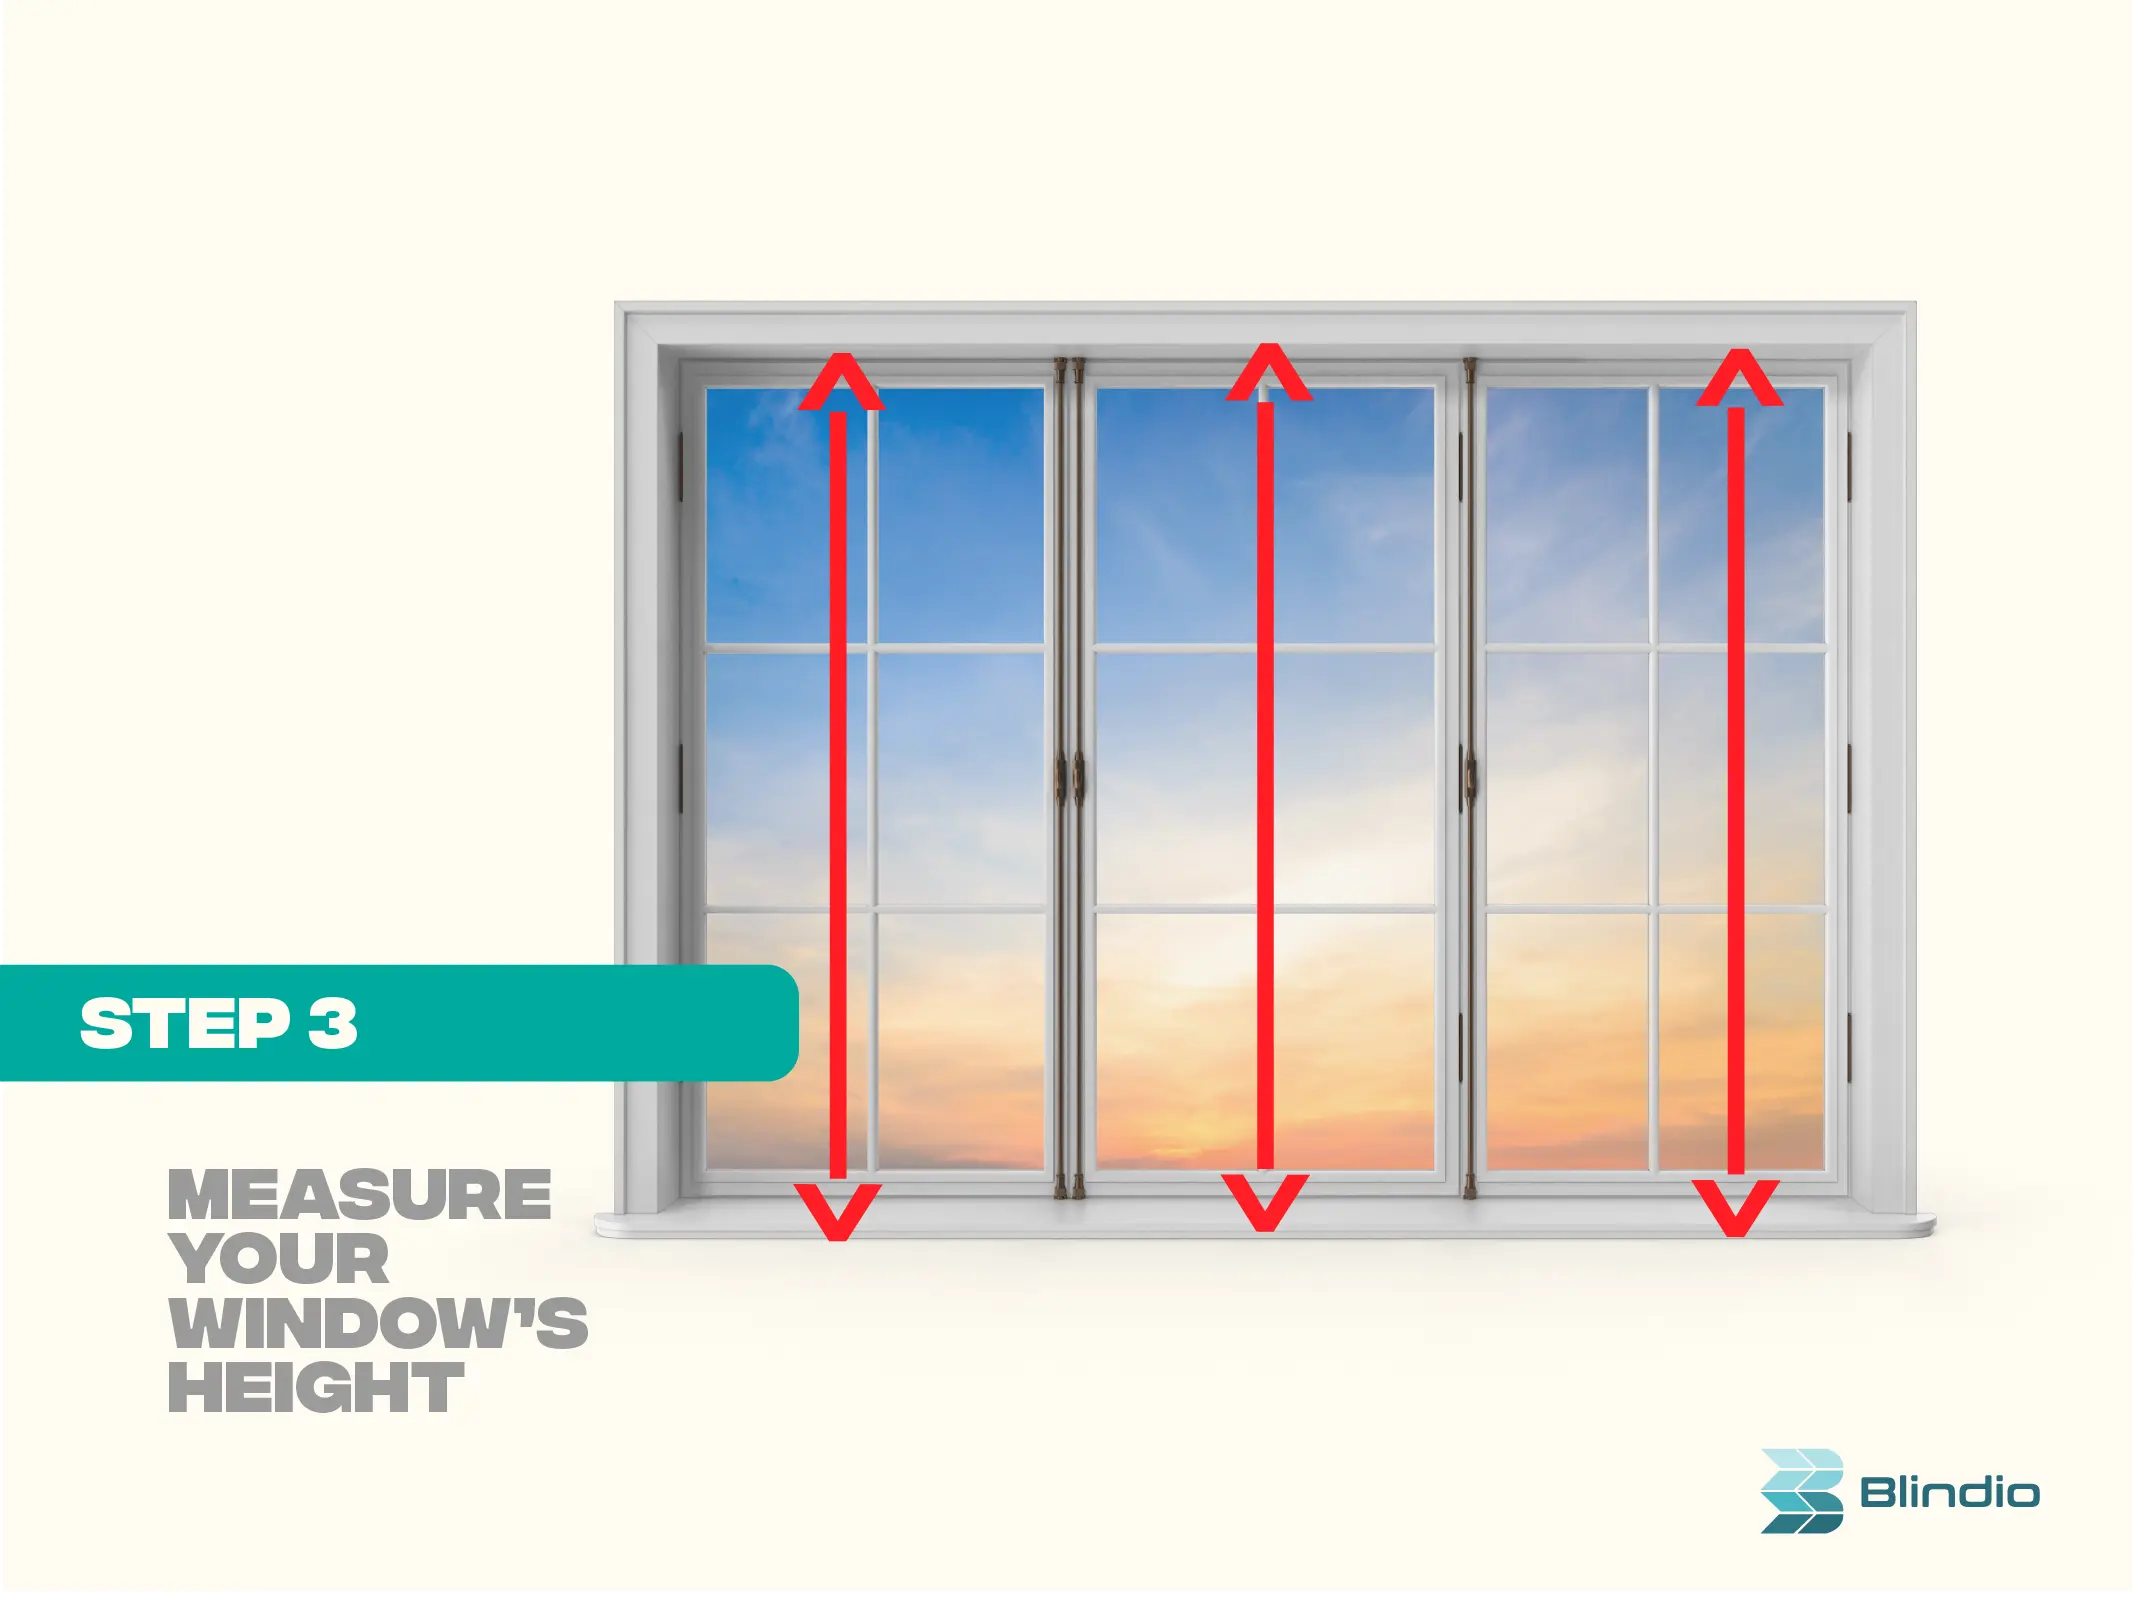
Step 3: Measure Your Window’s Height
Start at the apex of the window to measure its height. Measure up to the inside of the upper casing. Repeat measuring in three places – one for the left, center, and right sections of the window.
You need to write down the longest measurement to the nearest 1/8th inch. Write down the smallest measurement if you will be using a roller shade or vertical blinds. This will help you determine the optimal length of your window treatments.
Outside Mount Explained
Contrary to inside mounts, outside mounted window treatments are those installed outside of the window frame. By outside, it could mean on the trim or above the window. Choosing an outside mount fixing means more options for flexibility when choosing your blinds or shades.
Pros
If you want to create an illusion of a bigger room, an outside mount style can help. Why? The outside mount makes the windows look larger. The ceilings look higher, too!
If you are using a blackout shade, you can maximize its use by using an outside mount fixing. This is because this style of fixing fully blocks unwanted light, even light slippage cannot enter the room.
Cons
Outside mounted blinds and shades will show your blinds or shades outside the window frame. And since it is displayed that way, it decreases the otherwise usable space between windows.
Outside mounted window treatments can also be less effective in insulating against cold windows. This is because either the blinds or shades are hung away from the window glass.
Pro Tip: if you have an unappealing window frame, cover it up! An outside mount will certainly help. This way, you can have them out of sight while maximizing the use of any blinds or shades in your home!
How to Measure Outside Mount Window Coverings – Step-By-Step
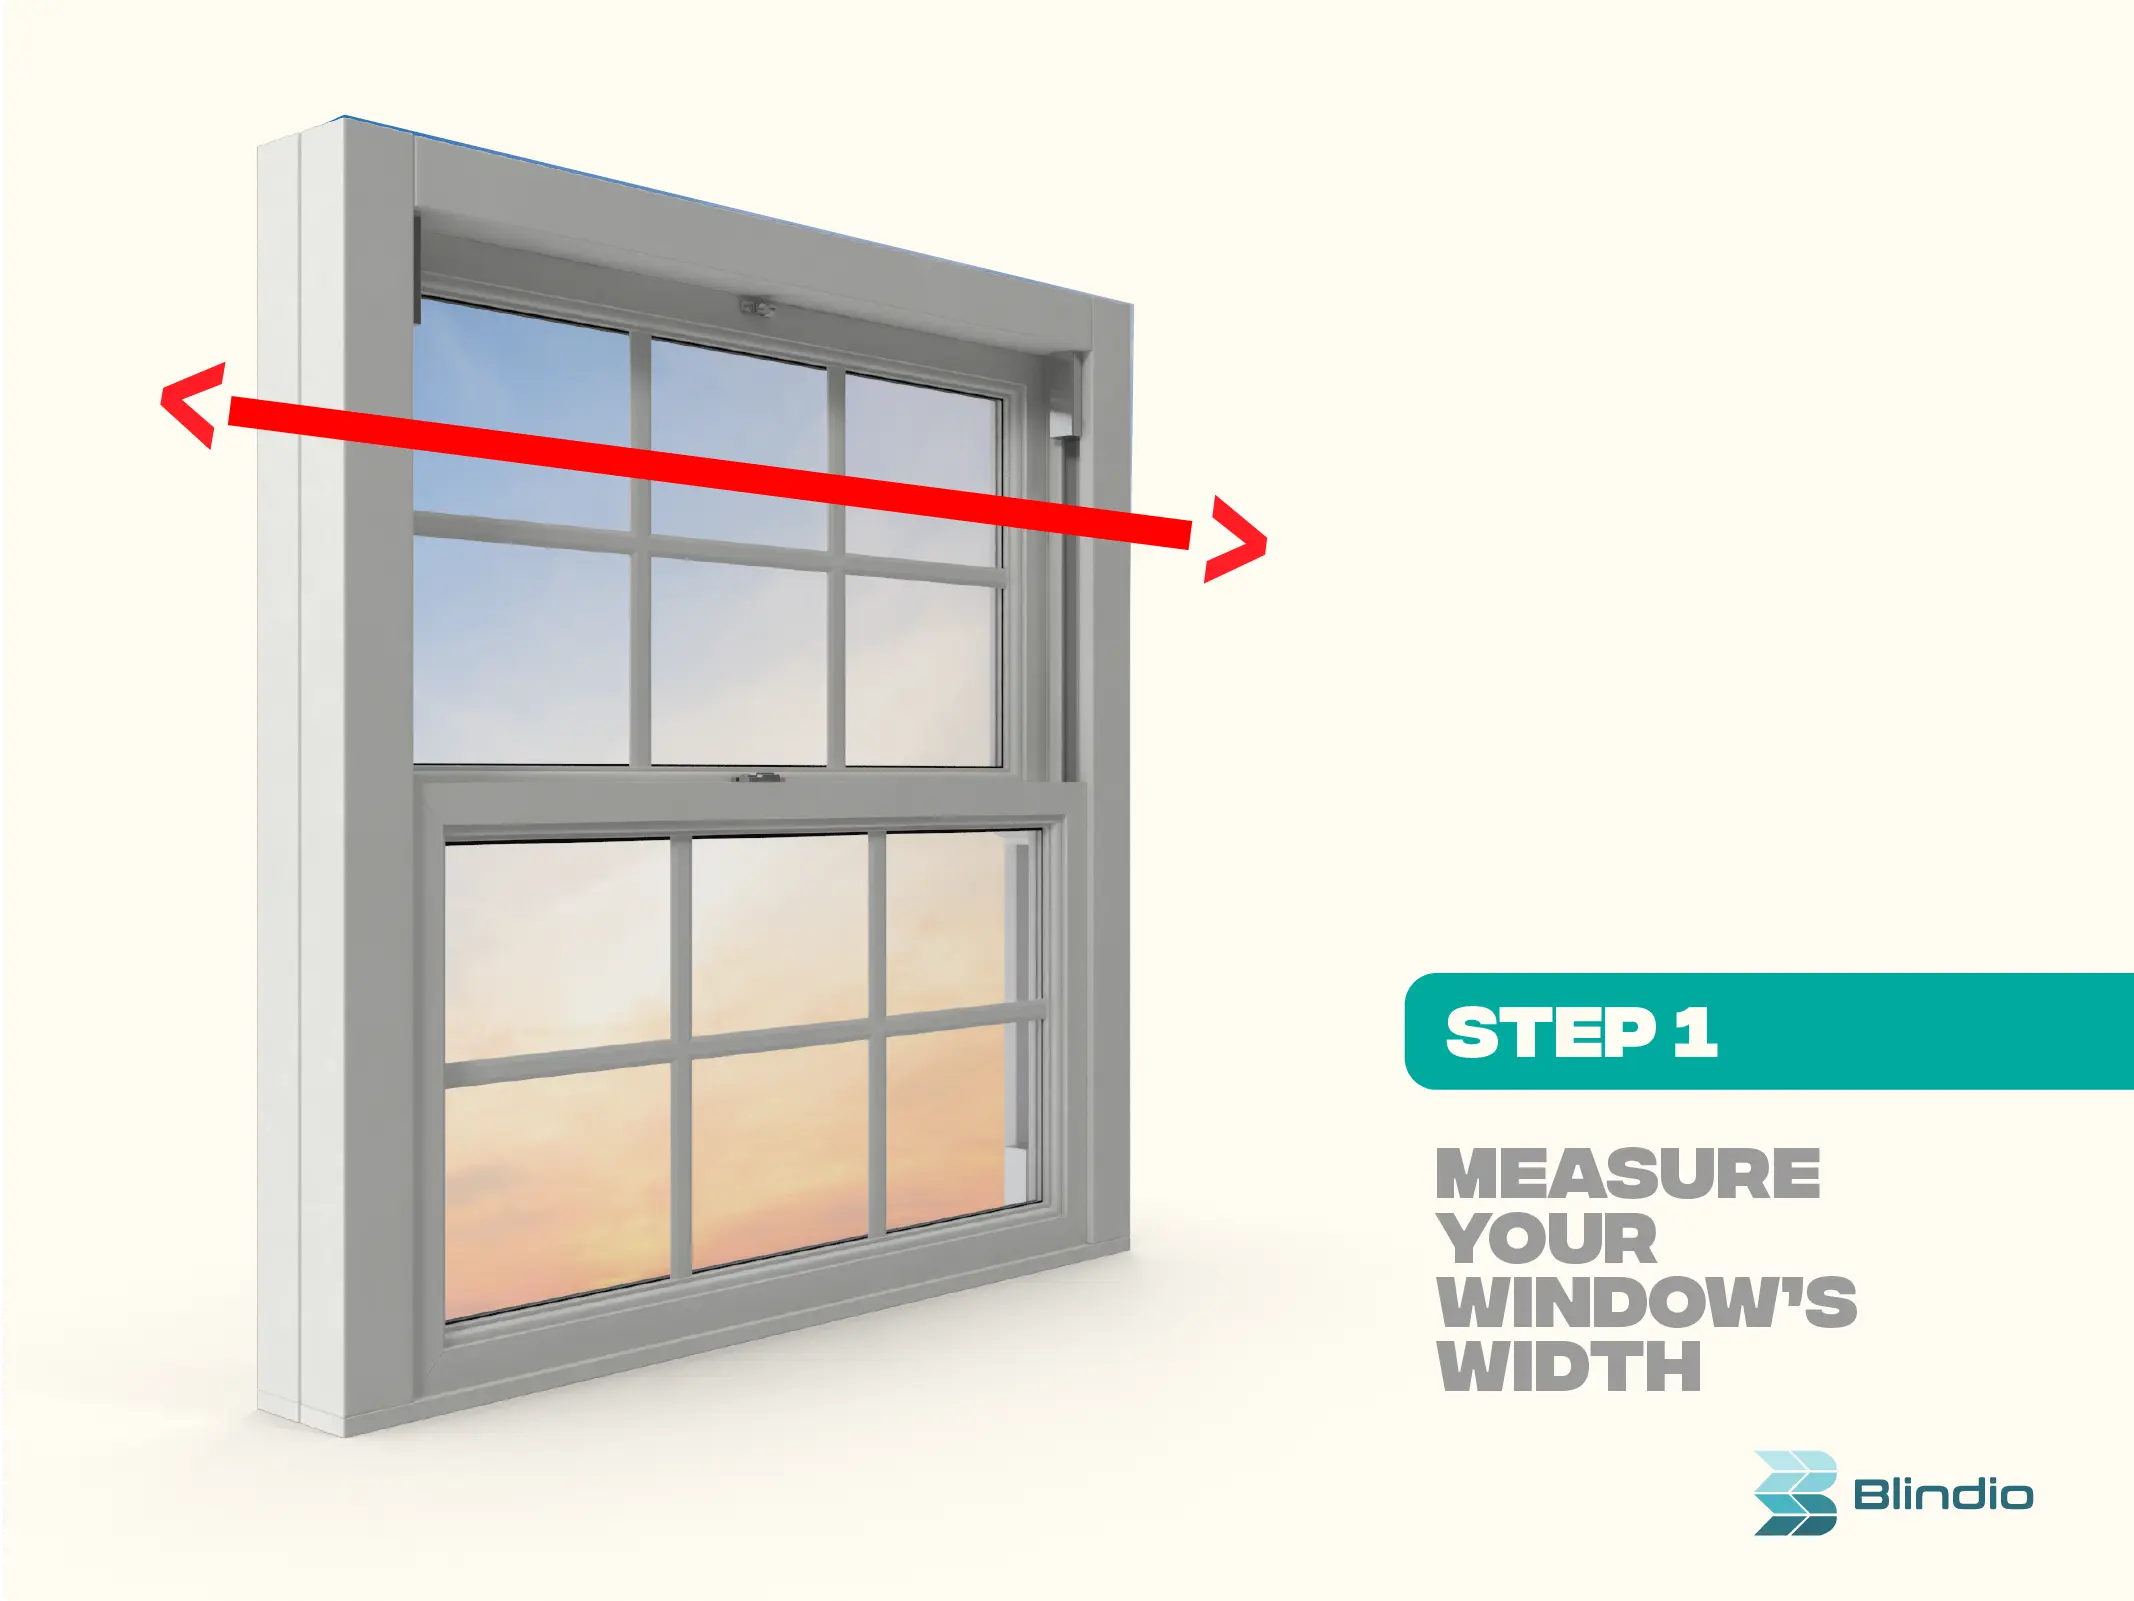
Step 1: Measure Your Window’s Width
Before measuring, you need to decide where you will want the apex portion of your blinds and shades to sit. You have two options for this: whether to position it on the wall above your window casing, or on the casing itself.
If you have already decided, put a mark on that spot using a pencil. After which, use the steel measuring tape to measure the width of your window. Take note that it should cover everything, from the frame, trim, and molding.
Add 3-4 inches to this measurement. This means you will be needing an extra 1.5 to 2 inches on the left and right sides, respectively. Don’t forget to write down the measurements as it is your guide for the width of your blinds and shades!
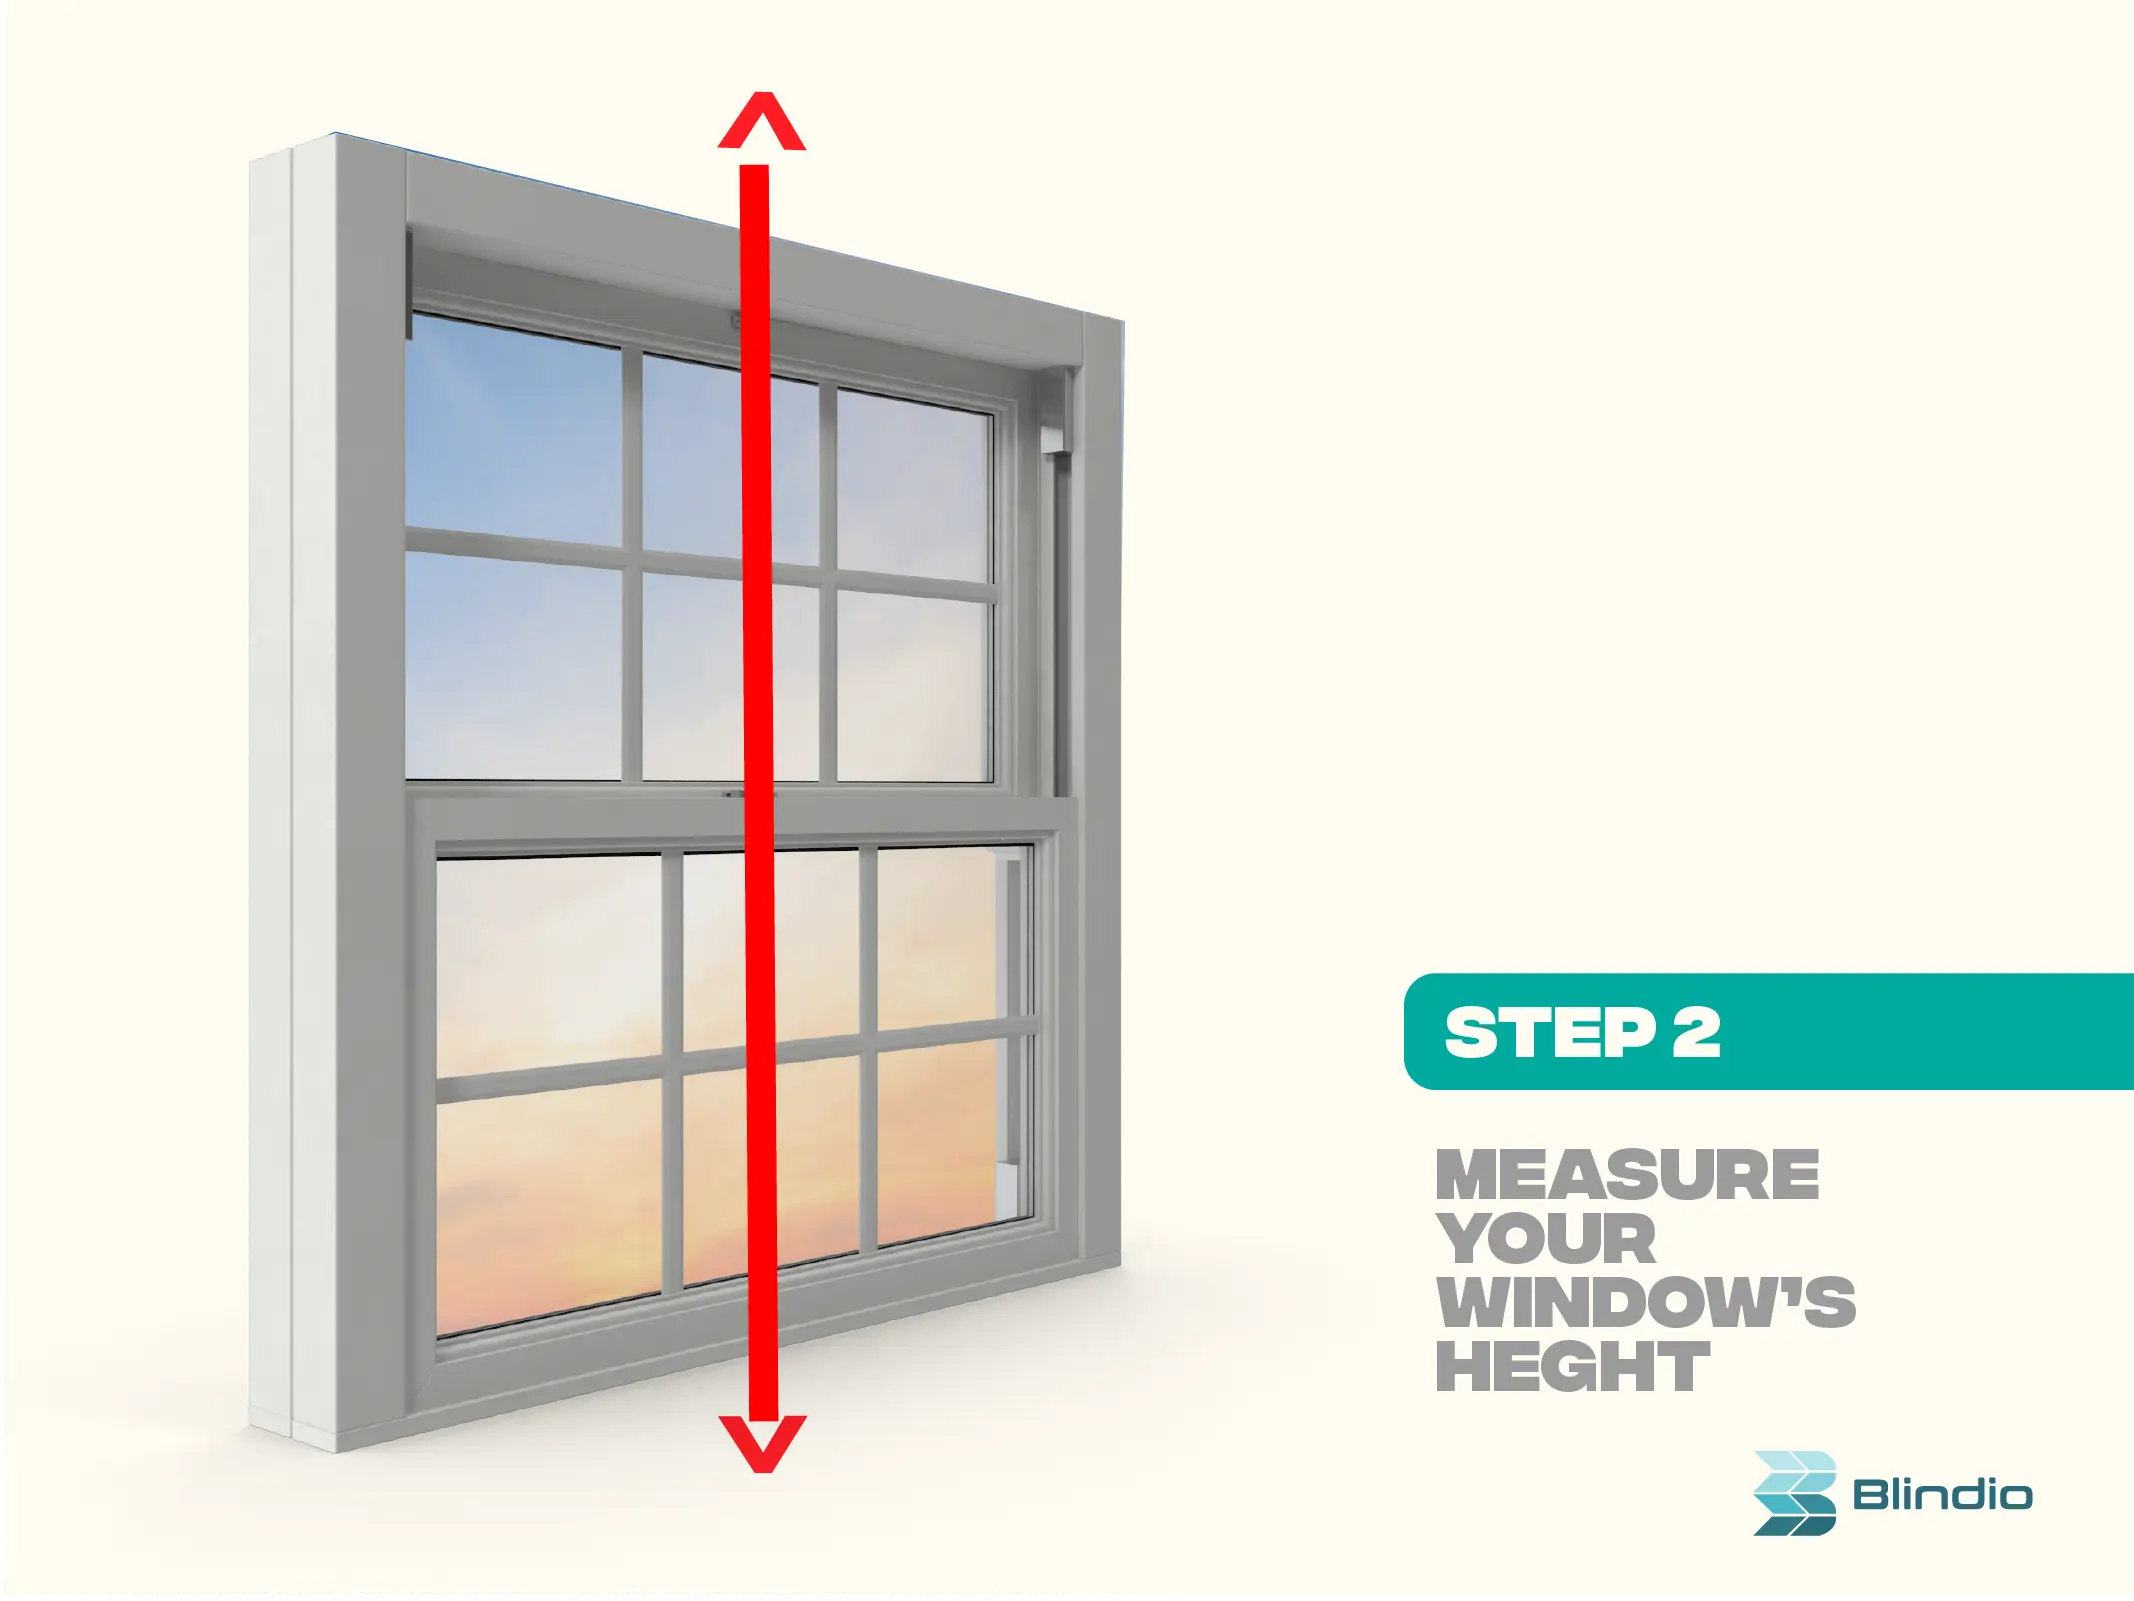
Step 2: Measure Your Window’s Height
Remember the pencil mark you put on earlier? Go back to it. This will serve as your base point in which the apex of the headrail will be installed. Get the measurement from that point down to the windowsill.
Pro Tip: To further create an illusion of a larger window, why not stretch your blinds or shades all the way to the floor? Depending on your budget, this can be a great way to add class and style to any room! Refer to the next step for this special measurement.
Extra Step: Measure Your Window’s Height (For Those With No Sill)
This step is perfect for those planning to use blinds or shades on any of the following:
- Glass doors
- Floor-to-Ceiling Windows
- Windows without Window Sills
Use your pencil mark to set the place where you want your window treatment to sit.
For glass doors and floor-to-ceiling windows, measure from the pencil mark all the way down to the floor. Make sure to add 1.5 inches to ensure that your blinds will reach the floor.
For windows without a sill, the instruction is simple. Just measure down to the exact point where you want your blinds or shades to end. You need to add 1.5 inches to this measurement to allow some room for extra flexibility.
Are You Ready To Give Your Space A Stylish Makeover?
Window treatments like blinds and shades definitely add beauty to your home. It goes without saying that a perfect measurement is needed to get the desirable results in terms of aesthetics and actual application.
The kind of mounting style, aside from window treatments themselves, will give a different impact on the room. If you are someone who has deep windows with beautiful window frames, you need to showcase that using an inside mount fixing.
On the contrary, you might want to opt for an outside mount if you have shallow windows and want to make them appear larger.
We hope that with our guide, you will be able to give yourself some knowledge — and maybe, courage. — to finally take the measurements yourself.